
Ultimate Guide from Motorola FRP Bypass
Best Motorola FRP Bypass Guide
Motorola devices have long proven their value in the mobile market by releasing new models with cutting-edge functionality. With the latest security update in its releases, the android operating system has made it more challenging to overcome Motorola c11 FRP bypass on handsets automatically. Due to Google’s recent Android Security updates, Motorola G24 Power FRP Bypass is now extremely tough. FRP is a novel security mechanism implemented in contemporary Android smartphones. To authenticate the valid owner, Android will prompt you to input the last Google account active on the phone before executing the hard reset.
So, this tutorial is for you if you’ve lost your existing Gmail account and your smartphone is stopped at the Google verification screen. This guide will show you the most recent technique for **Motorola G24 Power FRP Bypass-**Google Account Unlock. So attentively adhere to the simple method outlined below.
Am I able to bypass Motorola FRP?
What is FRP?
Factory Reset Protection (FRP) is a safety measure available on Android smartphones. When you establish a Google Account on your smartphone, FRP is felt most strongly. When FRP is enabled, it stops a device from being used after a factory data reset unless you log in with a Google identity.
How it works?
Factory Reset Protection is an enhanced security feature that is accessible on the bulk of Android smartphones. When you reset your Android phone, you’ll need your phone’s Login details to gain entry to it. But now, we’ll go through the free FRP tools that can bypass your Google FRP.
FRP will be triggered immediately after the Google accounts have been connected to the Android smartphone. If FRP is enabled, the Samsung smartphone cannot be used after a factory reset unless you connect using your Google login and username that you previously made on the Samsung device.
If you want to restore the factory reset on your Android phone, make sure you’re in the options, navigate to your Account Settings, head to your accounts and clouds, and remove the Gmail email account on your Android smartphone. This should activate the FRP feature on your Android device.
Requisite: Before attempting this method on your device, ensure that your cellphone has at least a 50-60% rechargeable battery to finish the upgrading process properly.
A simple list of solutions
To solve your problem, we have provided these three solutions you can have to unlock your android.
- Retrieve your Google account on another device
- Delete Google account from Settings
- Bypass Motorola FRP through PC by using a USB Cable
Solutions to Bypass Motorola FRP?
Retrieve your Google account on another device
The fundamental and most innovative way to do the Factory Reset is to recover a Google account. You can restore your Email ID or password from another device or computer before attempting FRP bypassing Motorola G24 Power .
You may also include an alternate email or phone number for the account you would like to restore. Google will email you a verification Motorola FRP bypass code, which you can use to create a new password for your Google account.
Once you change your password, it will require 24 to 72 hours for the reset password to synchronize with all gadgets connected to the account. After you’ve synced, you may do a factory data reset by entering your email address and a new password. You may factory reset your device by using this approach.
If you enter the incorrect password throughout this procedure, the time will be reset for the following 24-72 hours to synchronize. So, use caution while putting your email and password into the gadget. To finish the process, link your Motorola G24 Power to a connection and leave it on for the moment.
Delete Google account from Settings
Whenever we erase the Google account from the C11, we disable the FRP of the computer system Android 11, Realme. However, it is a prevention that ties the Motorola G24 Power to a Google account such that when it is restarted or prohibited due to loss or theft; it asks for the Google account login and password.
First step:
To remove your Google account, navigate to the settings icon on your Realme, which should be on the home screen or in the phone menu. You can reach the main menu by moving your fingertip from the bottom to the top of your screen.
Second step:
We browse through the C11 options and seek for the “Accounts” area, where you have to click to enable.
Third step:
All accounts associated with this Motorola G24 Power will be displayed, including Google accounts and other social media accounts such as Instagram, Facebook, TikTok, Twitter, etc. Choose the profile you wish to disconnect from this device.
Fourth step:
It will show the data associated with this Google account and the Motorola G24 Power . To proceed, click “Remove account.”
Fifth step:
To avoid accidentally disconnecting an account from the Motorola G24 Power , tap “Remove account” once more to verify. It will clear the Motorola G24 Power device of any data associated with this account.
Bypass Motorola FRP through PC by Using USB Cable
If you want to use your PC to bypass Motorola FRP, then here is another useful solution with the following steps:
Step 1:
The first step is to download and install a tool called “SideSync apk.” Once it is installed, run and connect your Motorola G24 Power with your PC by using a USB cable.
Step 2:
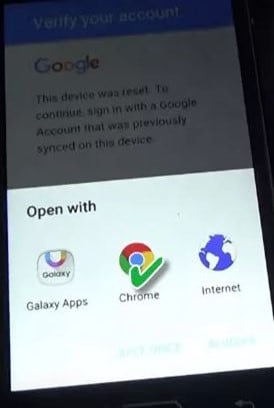
A pop-up screen will be shown asking you what Application you would like to use for opening the tool. Here you can select Chrome to open this too.
Step 3:
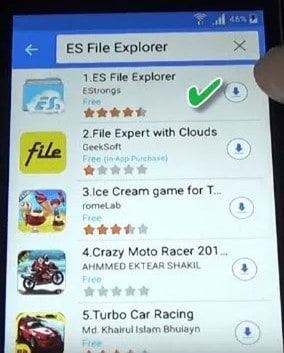
Your file will be downloaded through the Chrome browser. Then install ES File Explorer so that you can find and open the apk file.
Step 4:
Once the ES File Explorer is installed on your phone, find the APK file downloaded to your device, and install it. This will pop up in the settings menu, where you must choose the option of Backup and reset. Then select Factory data reset to rest your Motorola device. Here you go, you have bypassed the FRP of your device.
Conclusion
That’s it, guys. We hope this guide was helpful to you in order to bypass the Motorola G24 Power FRP. However, you can have the best option for the bypass as per your choice and convenience.
Full Guide to Bypass Motorola G24 Power FRP
I updated my Motorola G24 Power to the latest Android, and now it’s stuck on FRP lock. I don’t know how to Bypass the Pixel FRP lock, which is annoying because I have to finish an assignment. How should I do it?
The FRP lock is one of Google’s security methods for Android devices. It keeps unapproved people from erasing your phone data. However, an update or unidentified issue may sometimes lock your phone without warning. Just like the case above, it can be an unpleasant experience. Therefore, this Motorola G24 Power FRP bypass article will show you some ways to bypass it.
The Google FRP lock is not a new issue and can occur to almost any Android user. If you neglect to disable the Factory Reset Protection before a reset, Google will lock your phone. Therefore, you will have to bypass the Google account to resolve it.
Part 1: 3 Ways to Bypass Motorola G24 Power FRP
1. Download FRP Bypass APK (OTG Cable Needed)
The use of OTG for bypassing the Google FRP lock on Motorola G24 Power after a hard reset is a great technique to bypass the Google account lock.
Before we get to the guide, you need an Android OTG cable, fast Wi-Fi, and a PC.
![]()
If you do, follow these steps to start bypassing your Google account:
Step 1. Download the FRP bypass APK on your PC.
Step 2. Move (by copying) the APK document to your flash drive.
Step 3. Utilize the OTG cable to connect your Pixel phone and flash drive.
Step 4. Install the APK document on your Pixel device when the file manager application springs up.
Step 5. The phone Settings will presently be accessible for you to open.
Step 6. Look for and select the “Backup and Reset” choice.
Step 7. Select the “Factory Data Reset and then Reset everything from the phone. That will delete all the phone’s media files, settings, apps, and accounts.
Step 8. Your Pixel phone will reboot, and you won’t see the FRP lock.
![]()
2. Use Pin Lock Sim to Access Chrome
Step 1: Start the cycle by eliminating the SIM card from your Pixel device. Presently connect it to Wi-Fi.
Step 2: Insert the SIM card once more. Mistype your PIN code multiple times.
Step 3: You will be approached to give your PUK code straightaway. Continue to type wrong PUK numbers until the SIM card becomes unusable.
Step 4: Tap the padlock symbol on the lock screen to open another menu choice. You will see the warning setting choice at the top corner of the screen.
Step 5: Select the See All options. Search for the YouTube App and afterward go to Settings and open History and Privacy to access the Youtube ToS.
![]()
Step 6: This will open the Chrome Browser, where you select Accept and Continue. Then, at that point, pick Next > No Thanks.
Step 7: Find a dependable FRP bypass tool to unlock FRP on the program. Go to Security from Setting and open Pin Windows. Then use the Screen lock type to Unpin the SIM.
Step 8: Restart your device after setting up a PIN code. You can utilize your Pixel without marking into your underlying Google account.
Bonus Tip. Use Dr.Fone-Screen Unlock (For Other Android phones)
We have presented numerous FRP methods in this guide. Nonetheless, they might fail to tackle the issue some of the time. There is no question that a bypass tool will be a lot more straightforward and speedier. Therefore, we strongly recommend you use the Wondershare Dr.Fone Bypass FRP tool for a less complex and quicker strategy. Dr.Fone - Screen Unlock (Android) is a speedy, easy-to-use FRP bypass for you to get rid of the Google issue. It lets you access your home screen once more. Here are the needed steps for bypassing the Google FRP lock:
Step 1: Open the software, connect your phone and PC and pick Screen Unlock. Then click on Screen Unlock > Android > Remove Google FRP Lock.

Step 2: Pick your device’s brand and click Start.

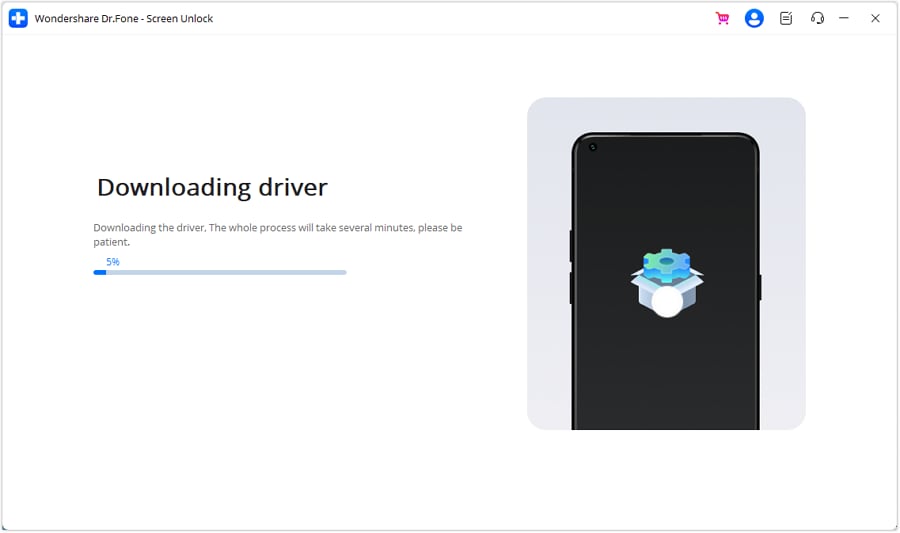
Step 3: Once you choose the Motorola G24 Power device brand, Dr.Fone will commence the download of the necessary driver.
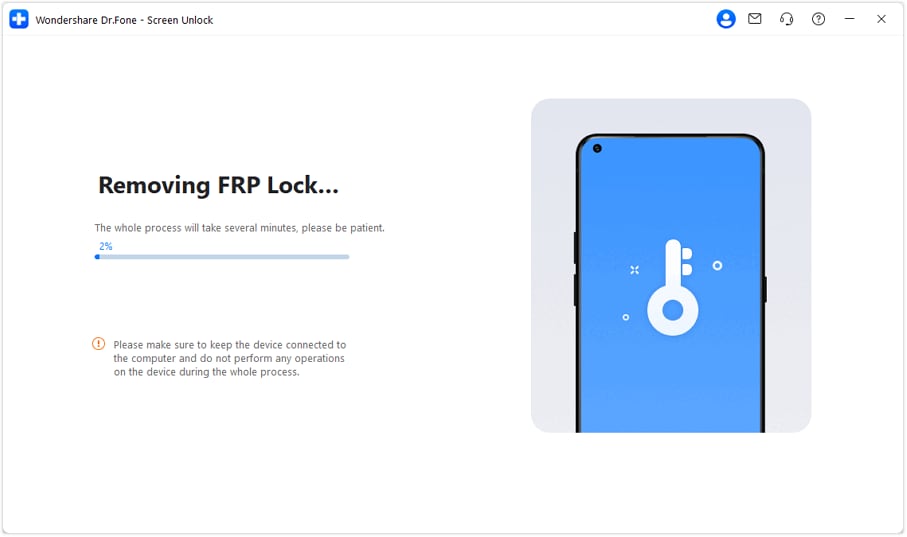
Step 4: After the download is complete, the procedure to eliminate the FRP lock will initiate, requiring a few minutes. Once the lock is successfully removed, tap Done to finalize the process.
 safe & secure
Part 2: Definition of Motorola G24 Power FRP
Factory Reset Protection (FRP) includes security on Android gadgets with OS Version 5.1 and higher. The FRP gives an underlying security highlight you can utilize that safeguards your gadget and data, including screen locks and data encryptions. The FRP automatically works once a Google account has been logged in on the phone. However, it will stop working when the Google account is removed from the Pixel phone preceding the Factory Data Reset. When the FRP has been enacted, it will not let others use your phone after a Factory Reset in an untrusted environment. It implies that the FRP Lock will come into play if your Pixel gets Factory Reset in an unrecognized way.
![]()
Part 3: Can factory reset really remove FRP?
To remove FRP, you must remove all Google accounts from your Pixel phone. After doing so, you can factory reset it to clear all your data. So technically, you need to remove all the accounts, and yes, a factory reset will work.
The Bottom Line
This Motorola G24 Power FRP bypass article gives an insight into the methods you can use to remove the FRP lock. However, if you have a other Android brand phone, the best one of all methods is using Dr.Fone - Screen Unlock (Android) . It delivers solutions for those who don’t know the OS variant of their phone. Its interface is easy to understand and has clear instructions. Moreover, bypassing the FRP lock is just a matter of a few minutes for it.
Is GSM Flasher ADB Legit? Full Review To Bypass Your Motorola G24 Power Phone FRP Lock
When encountering factory reset protection (FRP) locking on your device, the search for solutions often leads to recommendations for the GSM Flasher ADB Bypasser FRP tool.
But before you are thinking of using it, make sure you understand its features, benefits, and how to download and use this tool effectively. This article provides you a comprehensive overview of the GSM Flasher Adb Bypass FRP tool, covering essential information that will guide you through the FRP bypass process.
Part 1. Full Review of the GSM Flasher ADB Bypasser FRP Tool
The GSM Flasher ADB Bypasser FRP tool is a reliable solution designed for users encountering FRP activation on their Android devices. It offers a quick and effective solution to regain access to your locked device by bypassing the FRP lock in just a few minutes.
To help you make an informed decision about using this tool, let’s explore its key features:
- Helps you to unlock various screen locks on Android, including patterns and PIN locks
- Exhibits broad compatibility, extending its support to a majority of Android devices
- Free of charge
While the GSM Flasher ADB Bypass FRP boasts a visually appealing interface, it’s worth noting that the software may present a steeper learning curve for some users. If you are not familiar with Android debugging and ADB processes, you might find the initial setup somewhat challenging.

GSM Flasher ADB Bypasser FRP compatibility list
The GSM ADB FRP Tool is compatible with a wide range of Android devices and Windows operating systems. Here’s the breakdown of its compatibility list:
Android:
Android 5.1 Lollipop, Android 6 Marshmallow, Android 7 Nougat, Android 8 Oreo, Android 9 Pie, Android 10, Android 11, and Android 12.
Windows:
Windows XP, Windows 7, Windows 8, Windows 10, Windows 11 (X32 and X62 bit).
Supported phone models
| Samsung | Samsung A3, A5, A7, A9, A40, A10, A30, A20, J7, J2, J7 Prime, J5, J1, core 2, M10, M20, M30, M40 |
|---|---|
| Moto | Moto G3, Moto E, Moto G4 Play, Moto E 4 Plus, Moto M, Moto G 5S Plus, Moto G Turbo, Moto Turbo |
| ZTE | ZTE Sonata 3, ZTEZ982, ZTE Z835, ZTE Blade, ZTE Z833, ZTE N9560, ZTE Zmax Pro, ZTE Z831, ZTE Z981 |
| LYF | Jio LYf Phone, Jio Keypad Phone |
| Intex | Intex Aqua, Aqua Star 2, Aqua Power Plus, Aqua Y2 |
| Lenovo | Lenovo Z2 Plus, Vibe K5, A2010, K5, Vibe, A6600, Lenovo A1000 |
| LG | LG Aristo, LG stylo 3, LG K10, LG K20, LG Stylo 2, LG G6, LG G4, LG G5, LG G20, LG K20 Plus |
Pros and Cons of Using GSM Flasher ADB Bypass FRP Tool
Dealing with FRP lock using the GSM Flasher tool also comes with its share of drawbacks. Let’s break down its strengths and weaknesses to help you decide if it’s the right fit for your needs.
Pros:
- A free solution to unlock their Android devices from FRP lock
- While it works with other Android devices, Samsung users have higher success rates of unlocking their devices with this tool
Cons:
- You need to disable antivirus software when using the tool, raising security concerns
- The tool does not work uniformly across all Android devices and versions
- The tool’s usability may pose a challenge, especially for beginners
Part 2. How To Use GSM Flasher ADB Bypasser FRP Tool
Now, we are moving on to the crucial aspect: How to use the GSM Flasher FRP tool. Employing this tool to unlock your Android device from FRP lock requires a systematic approach. If you’ve decided to use this bypasser FRP tool, the first step is to download GSM flasher tools and install them from this link.
Once the installation is complete, you can proceed with the following step-by-step guide to efficiently use GSM Flasher ADB Bypasser FRP and regain access to your locked Android device.
- Step 1: Make a connection between your phone device and your PC
After completing the tool download, employ a USB cable to connect your Motorola G24 Power. The GSM Flasher FRP tool will be recognized by your Android device, while the tool will identify the name and Android version of your connected device at the same time.
- Step 2: Perform FRP lock bypass
Proceed by clicking “Remove FRP” on your computer. It’s essential to be aware that this process will require a few minutes, so be patient until the tool successfully unlocks the FRP lock on your phone.

Part 3. Quick and Easy Bypasser FRP Tool Alternative
If your phone model is not compatible with GSM Flasher ADB or if the tool doesn’t seem to suit your needs, a reliable and swift alternative for FRP bypass is Wondershare Dr.Fone. Dr.Fone offers the Screen Unlock feature that is intricately crafted to streamline the FRP bypass process, ensuring both ease and efficiency.
Additionally, Dr.Fone offers support for a vast array of over 2000 Android phone models, providing a comprehensive solution that caters to a more diverse range of devices.
List of features:
- Supports a vast range of iOS and Android device models
- Minimizes the risk of data loss during the FRP unlocking process, preserving crucial files and information
- Dependable to unlocking Android devices when faced with forgotten screen lock credentials
How to bypass Google verification using Dr.Fone’s Screen Unlock:
- Step 1: Launch Dr.Fone Screen Unlock and connect Android device.
Launch Wondershare Dr.Fone on your computer and connect your Android devices. Go to Toolbox > Screen Unlock.

- Step 2: Select Remove Google FRP Lock.
On the next screen, choose Android as your device type and select Remove Google FRP Lock to proceed.
- Step 3: Select the Android device model.
Pick your Android device model and proceed by clicking the Start button.
- Step 4: Choose the Android version.
Now, specify your Android version. If you’re unsure about the Android OS version on your Android or prefer the quickest method to eliminate the Google Lock, select the All Android versions (One-Click Removal) option. Click “Start” to continue.

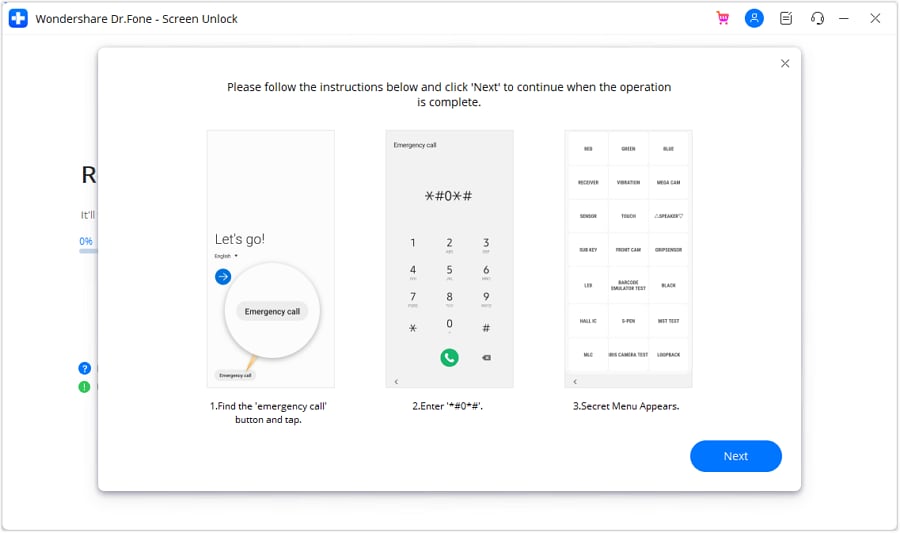
- Step 5: Follow the instructions to access an Emergency Call.
Follow on-screen instructions to open Emergency Call on your Android. Dial #0# to open a secret menu and click Next on your computer.
- Step 6: Enable USB debugging.
Now, your Android screen will display a notification to enable USB debugging. Once you grant permission on your phone device, proceed to click “Authorized” on your computer screen.

On your computer, the next screen will show that the FRP lock is being removed from your Android device. Once it’s successfully removed, a window will pop up saying it’s done. Click “Done” if you’ve completed the process successfully.
Tips: Are you searching for a powerful FRP Unlock tool? No worries as Dr.Fone is here to help you. Download it and start a seamless unlock experience!
Conclusion
The GSM Flasher ADB Bypasser FRP tool offers a cost-free and versatile solution to bypass FRP locks on a range of Android devices. While it provides an effective means to unlock your device, you might need to consider its compatibility, potential legal implications, and the learning curve associated with its usage.
As an alternative, tools like Dr.Fone can be explored for additional compatibility and ease of use. And, of course, the choice between these tools depends on your preferences and specific device requirements.
Also read:
- [New] Unveiling the Typical Podcaster's Income for 2024
- [Updated] Detailed Review for Easy HDR for 2024
- [Updated] Pristine Screenshot Tool - Free and Simple
- 2024 Approved Ace Your Content Strategies to Skyrocket Video Popularity
- A Step-by-Step Guide on Using ADB and Fastboot to Remove FRP Lock from your Oppo Reno 11 Pro 5G
- How To Unlock a Tecno Spark Go (2024) Easily?
- In 2024, 10 Fake GPS Location Apps on Android Of your Samsung Galaxy F34 5G | Dr.fone
- In 2024, How to Bypass Google FRP Lock from Nokia C12 Pro Devices
- In 2024, Ultimate Guide from Lava Yuva 2 FRP Bypass
- The Complete Guide to Samsung Galaxy A14 5G FRP Bypass Everything You Need to Know
- YL Computing July 2019 Desktop Backgrounds & Calendars: The Ultimate Digital Planner
- Title: Ultimate Guide from Motorola FRP Bypass
- Author: Liam
- Created at : 2025-02-11 02:11:39
- Updated at : 2025-02-15 00:29:03
- Link: https://android-frp.techidaily.com/ultimate-guide-from-motorola-frp-bypass-by-drfone-android/
- License: This work is licensed under CC BY-NC-SA 4.0.