In 2024, A Step-by-Step Guide on Using ADB and Fastboot to Remove FRP Lock on your Motorola Razr 40

A Step-by-Step Guide on Using ADB and Fastboot to Remove FRP Lock on your Motorola Razr 40
Factory Reset Protection is one of the security measures available on Android 5.1 and later devices to prevent intruders’ unauthorized factory resetting of the Motorola Razr 40 device. Among the several ways to fix this issue and remove the lock, one is ADB and Fastboot commands. So, if you are aware of using Android Debug Bridge, the below content will help you understand how it can be used to remove the FRP lock.
You can watch the video below to bypass FRP lock without hassle!
Part 1: Quick Overview of ADB and Fastboot Commands
1. What are ADB and Fastboot?
Standing for Android Debug Bridge, ADB and Fastboots are the methods through which communication with an Android device can be done through a computer. Under this method, the commands and the actions that are sent from the system are performed on your Android device.
Several issues can be resolved, and multiple functions can be performed using the ADB format tool and Fastboots, and this also includes removing the FRP lock on your Android device. To use this method, USB debugging should be enabled on the Motorola Razr 40 device.
For specific brands of Android phones, specific utility tools are available like the Vivo ADB format tool and the Samsung ADB format tool, which are used explicitly for Vivo and Samsung phones, respectively.
2. How Do ADB and Fastboot Bypass FRP?
Using the versatile ADB command-line tool and Fastboots, the Google FRP lock can be removed using several commands depending on the OS version. This is a client-server program that includes a client who sends the commands, a daemon used to run the commands on the Motorola Razr 40 device, and a server that facilitates communication between the client and the daemon.
ADB comes included in the Android SDK Platform-Tools package, and this can be downloaded using the SDK manager.
3. What Are the Android Versions that ADB and Fastboot Command Support?
The Android versions on which ADB and Fastboot commands can be used are as follows:
_Android 5 – Lollipop__Android 6- Marshmellow__Android 7 – Nougat__Android 8- Oreo__Android 9- Pie__Android 10 – Q (expected to work though not tested as yet)_
Part 2: How to Set Up ADB and Fastboot Commands to Remove FRP Lock on Android?
To remove FRP lock using ADB, you first need to install and set up ADB and then remove them using the command. The steps for the same are enlisted below.
Steps to remove FRP using ADB

Step 1. Firstly, download the ADB installed setup file and then extract the files from the toolkit on your system in a folder.
Step 2. Next, you need to run adb.setup.exe and then type Y for installing the drivers for ADB and Fastboot.
Step 3. Again, enter Y for installing the drivers and when done successfully, the command window will close.
Step 4. Next, power on your Android device and connect it to your PC using a USB cable. Here also ensure that USB debugging mode is enabled on your Android device.
Step 5. Next, hold down the Shift key and then right-click at any place blank in the ADB folder, and then choose the Open command window here option.
Step 6. Now to remove the FRP you need to enter the following commands at the command prompt one by one where enter needs to be clicked after every line.
_Adb shell am start -n com.google.android.gsf.login/__adb shell am start -n com.google.android.gsf.login.LoginActivity__adb shell content insert –uri content://settings/secure –bind name:s:user_setup_complete –bind value:s:1_Step 7. The above commands are for Samsung devices. If you want to remove the FRP on other brands, enter the following commands:
_Adb shell content insert –uri content://settings/secure –bind__name:s:user_setup_complete –bind value:s:1_

After the execution of the commands, the FRP lock will be removed from your Android device.
Steps to remove FRP using Fastboot
Step 1. Put the Android device into the bootloader or fastboot mode. (depending on the model and brand of your Android device, the process of entering into the fastboot will differ).
Step 2. Connect your phone to your PC using a USB cable.
Step 3. Next, depending on the system, enter the following command in the CMD window:
_Lenovo FRP command__fastboot erase config__fastboot reboot__XIAOMI FRP command__fastboot -w__MICROMAX YU YUPHORIA FRP__Fastboot -i 0x2a96 erase configFastboot -i 0x2a96 reboot__DEEP/HTC/Other Brands FRP__fastboot erase configfastboot reboot_
Part 3: Limitations of Using ADB and Fastboot Command Method
The ADB and Fastboots command is a workable solution for removing the FRP lock on your Android device, the drawback is that the method is quite complicated and requires thorough technical know-how of ADB and its working. There are several limitations associated with this method as enlisted below.
- Requires technical know-how
To remove FRP using the ADB command you need to have a thorough knowledge of using the tool. The tool has a deep learning curve which makes this method little for the majority of the users.
- Might not unlock the phone
You can try the ADB method for removing the FRP lock but there is no guarantee that the results will be positive and your device will be unlocked.
- Issues with the drivers
Several times while using this method, you might encounter driver issues when your device is not detected as proper drivers are not installed.
- Unexpected issues and errors
ADB is a command-based method, and thus it is important that the commands are entered right. If there is a slight error in the typing of the command, it might lead to major issues and can even be the Motorola Razr 40 device damaged.
- The process is not user-friendly
ADB is a technical process aimed toward the geeks, and thus the overall process is not user-friendly and complicated.
Part 4: The Best ADB Alternative to Bypass FRP Lock on Android Phones
Considering the several limitations of the ADB and Fastboot command method, the need for a simple, user-friendly, and workable solution for removing FRP lock on Android devices arises. One of the best software here that we recommend is Dr.Fone - Screen Unlock (Android) which helps in removing and bypassing many Android phone screen locks including the one appearing due to FRP lock.
Dr.Fone - Screen Unlock (Android)
Remove Google FRP on Samsung without PIN code or Google accounts.
- Pattern, PIN, password, fingerprints & face screen lock can all be unlocked.
- Bypass Google FRP on Samsung without pin code or Google accounts.
- No tech knowledge asked, everybody can handle it.
- Work for Samsung, Xiaomi, Redmi, OPPO, etc.
4,005,551 people have downloaded it
The process of using the software is user-friendly and thus can also be used by non-techy users.
Steps for removing FRP lock on Android using Dr.Fone Screen Unlock
- Step 1. Launch the installed software and choose the Screen Unlock option from the main interface. Choose Android and then select the Remove Google FRP Lock option.

- Step 2. Select the model brans from the options shown on the interface, and then connect your phone to your PC using a USB cable. The connected device details will appear on the interface.
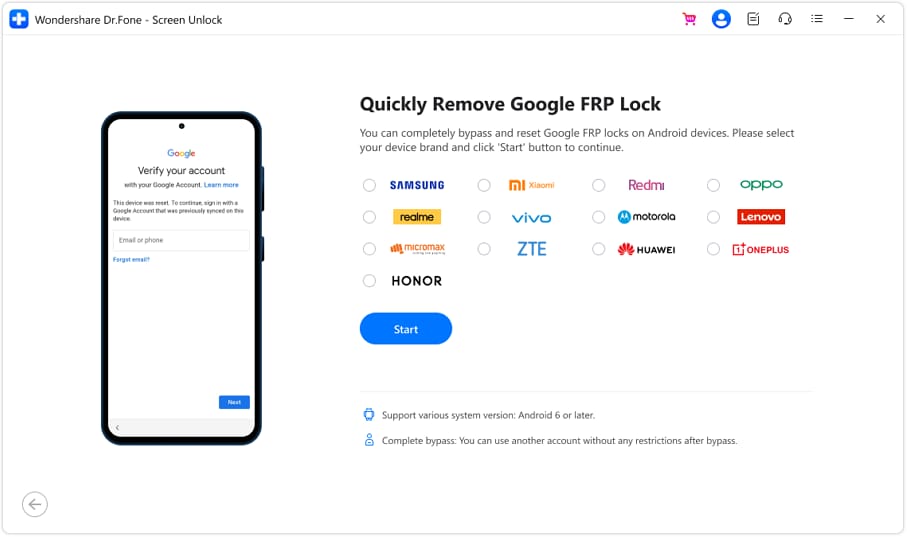
- Step 3. Follow the next steps as they appear. Once the FRP lock is successfully removed, the prompt window will show its completion. Click Done if you have successfully executed the process.
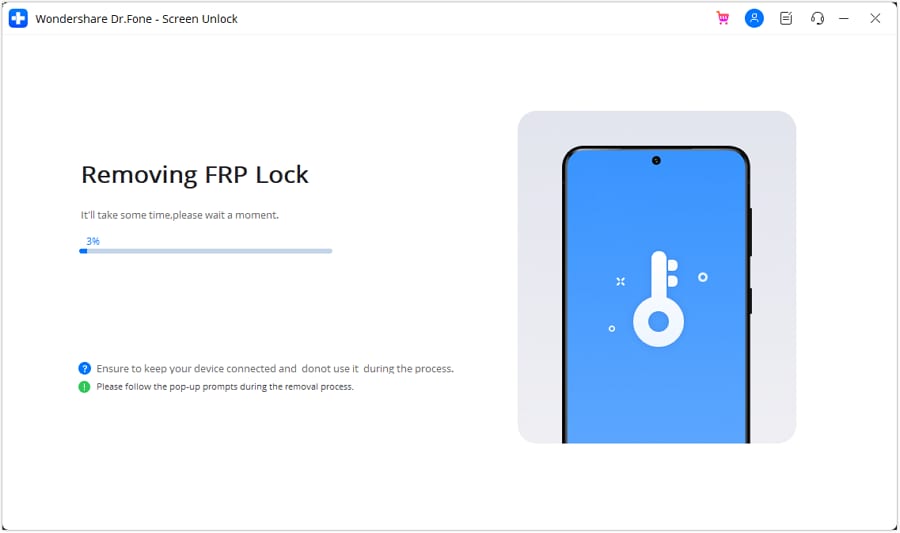
The above is the brief steps for the process. You can check the bypass Samsung FRP lock guide in detail.
Conclusion
If you are well versed with the commands of ADB and Fastboots you can go ahead and use the ADB bypass FRP tool for removing the FRP lock but if this command line method seems complicated for you, Dr.Fone Screen Unlock is the best tool to use.
A Quick Guide to Motorola Razr 40 FRP Bypass Instantly
FRP locks are a security feature that prevents unauthorized access after a factory reset. While these locks protect user data, they can become a hindrance when trying to regain access to the Motorola Razr 40 device. Likewise, bypassing FRP locks provides users with the flexibility to overcome these restrictions.
In this article, we’ll learn about the Motorola Razr 40 FRP bypass process. We will also list out the things that you must keep in mind before trying this process. Read this guide till the end to find the best Motorola Razr 40 FRP unlock tool.

Part 1. Things To Keep in Mind Before Bypassing Motorola Razr 40
Bypassing the security measures on a Motorola Razr 40 should be approached with caution. There are many considerations that users should keep in mind before the Motorola Razr 40 FRP bypass. Below, we have listed some considerations to help users avoid any hassle:
1. Legal Implications
Bypassing device security could potentially breach the terms of service and warranty agreements. Moreover, it may even be illegal in certain jurisdictions. It is recommended to avoid bypassing unless users are certain it is legally permissible in their region.
2. Data Loss
When resetting the Motorola Razr 40 device, bypassing security measures often comes into play. This sometimes results in the loss of stored data. Prioritize data backup before attempting Motorola Razr 40 FRP bypass. If data preservation is a top priority, exploring alternative solutions is preferable.
3. Security Risks
Your device might be exposed to potential vulnerabilities due to security FRP bypass. This makes it more susceptible to unauthorized access. Users should prioritize safeguarding their data and personal information.
4. Manufacturer Support
Motorola Razr 40 FRP bypass can void the manufacturer’s warranty and limit future support options. You should know that bypassing security could result in losing access to updates. It is advisable to explore other solutions before considering bypassing.
5. Technical Skill Requirements
Technical knowledge and skills are highly demanded when bypassing FRP locks. Only users possessing advanced technical skills should attempt a bypass. For those lacking expertise, seeking professional assistance is advisable to avoid consequences.
6. Device Functionality
Bypassing security measures may impact the Motorola Razr 40 device’s normal functionality. Users should be prepared for potential device performance or functionality issues post-bypass.
Part 2. Bypass FRP Lock Motorola Razr 40 Using SIM Card Method
Using the SIM card process for Motorola Razr 40 FRP bypass is a viable option for many users. Still, proceeding with caution and adhering to the specific instructions is necessary. Users only need to insert a PUK-enabled SIM card and set up their device. Consider using the steps guided below to carefully bypass your Motorola Razr 40 without any risks:
- Step 1. Power on your Motorola Razr 40 device, set it up, and connect it to the Wi-Fi network. Agree to any terms or policies and wait until your phone gets ready. When you reach the verification screen, tap the “Use my Google Account Instead” option.

- Step 2. Once you are required to sign in to your Google account, return to the screen where you have to select the language. Then, insert the SIM card into your phone and ensure you have saved a contact. To enter the SIM PIN, tap on the “Emergency” option. Next, tap “Emergency Information” and click the “Edit” icon at the top-right corner.

- Step 3. Enter the PIN for the SIM card to proceed further. Under the “Emergency Information” section, tap on the “Add Contact” option and access it. Dial the call to that number, and once the call timer appears, choose the “Contacts” option on the dialer screen.

- Step 4. Tap on “three-dots” at the top-right corner and select the “Share” option followed by “Send as text.” On the following screen, send via XShare MI and allow the necessary permission. Download Google Account Manager and Account Login/FRP Bypass APKs on your other device. Also, download the Activity Launcher app from the Play Store.

- Step 5. Set up XShare on another device and allow all the permissions. Choose the “Receive” option to receive the contact from your Motorola Razr 40 device via a QR code scan. Afterward, disconnect and exit the current connection. On the main screen, tap the “Receive” option on your Motorola Razr 40 and scan the QR code using the Motorola Razr 40 device. You are required to share all three of the apps that you just downloaded.

- Step 6. As soon as the apps are received, install them and “Open” the Account Login/FRP Bypass tool. When it requires a password for sign-in, hit the “three-dots” and choose the “Browse Sign-In” option. Provide your Email and Password to sign in to your Google account.

- Step 7. After Google signs in, “Open” the Activity Launcher app and wait until the package is loaded. From the appearing menu, select “Android Setup” and then choose the following option:
Android Setup (com.google.android.setupwizard/.predeferred.PreDeferredSetupWizardActivity)
Once setup ends, the Motorola Razr 40 FRP bypass Android 11 process will be completed successfully.

Part 3. How to Easy Motorola Razr 40 FRP Bypass With Wondershare Dr.Fone
Facing FRP lock on your Motorola Razr 40 can be daunting, especially when you need to access your phone urgently. In this case, using the above-discussed SIM card method can be time-consuming. Users looking for an alternative and quick option can use Wondershare Dr.Fone – Screen Unlock (Android). This tool can help bypass FRP lock on your Android without requiring any PIN or Google account.
Moreover, users don’t need technical knowledge as this tool offers one-click removal. Dr.Fone also adopts a user-friendly interface, ensuring accessibility for every user. Apart from Motorola Razr 40 FRP bypass Android 11, this tool also unlocks Samsung and LG devices without data loss.
Salient Features of Wondershare Dr.Fone
- Fone supports over 2000 Android devices across 18+ brands for screen unlock.
- This tool extends the opportunity to recover data from Android devices with broken screens.
- When it comes to recovering device data, Dr.Fone offers a dedicated Data Recovery tool to recover all important lost files.
Steps To Perform Motorola Razr 40 FRP Bypass Using Wondershare Dr.Fone
By bypassing the FRP lock, Dr.Fone allows users to gain access to their devices promptly. To start learning about using this tool, follow the steps below for Motorola Razr 40 FRP bypass:
Here is a video for you to learn how to bypass FRP:
- Step 1. Connect the Motorola Razr 40 device and Navigate to the Toolbox
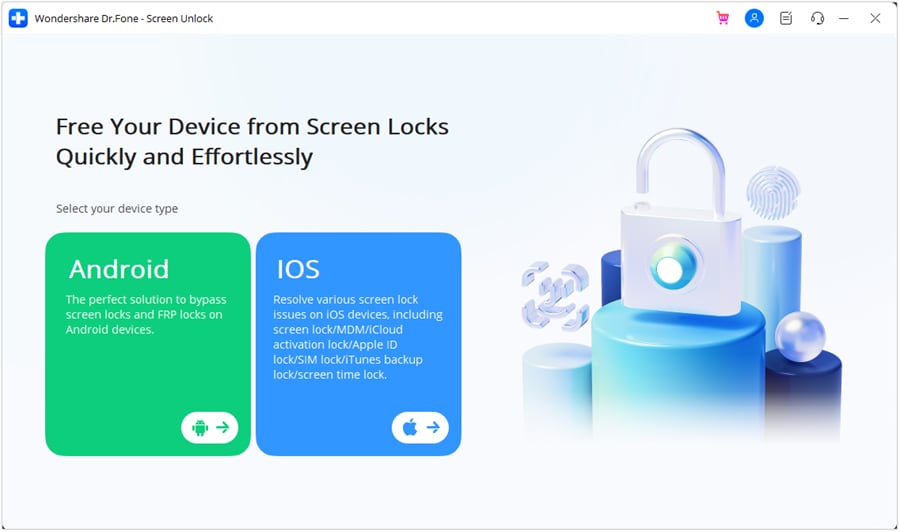
Connect your Motorola device to your computer and launch Wondershare Dr.Fone. Within the toolkit window, navigate to “Toolbox” and select “Screen Unlock.” This will open a new window; choose the “Android” option to access the FRP Lock function.
- Step 2. Choose the Required Device and Android Version
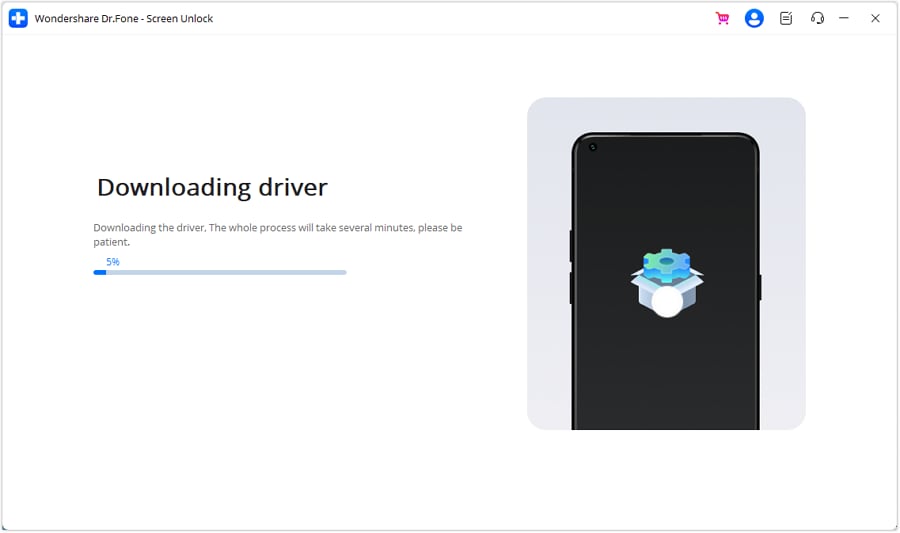
Afterward, click “Remove Google FRP Lock” and select your appropriate device brand from the options. This will trigger Dr.Fone to download the relevant driver for the selected brand.
- Step 3. Access Emergency Call and Enable USB Debugging
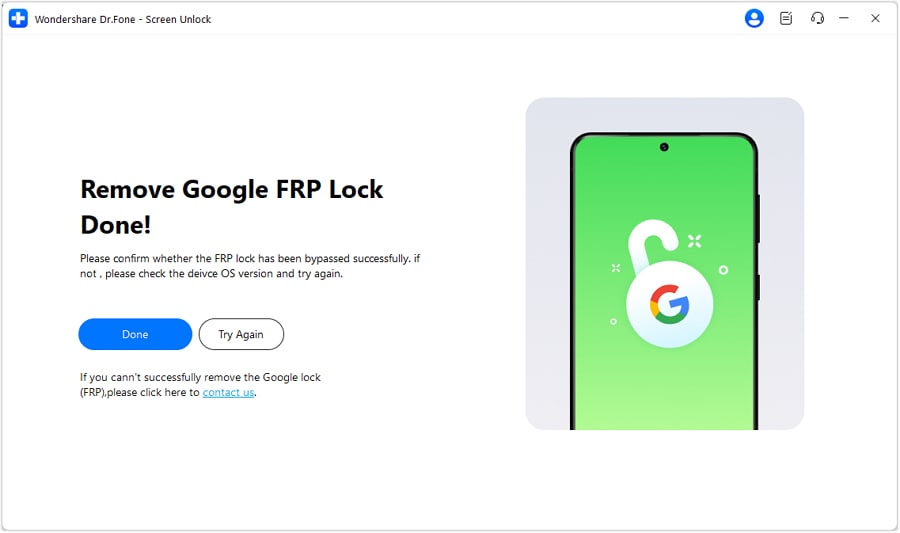
After downloading the necessary drivers, power off your smartphone and connect it to the computer. Press the “Volume Up” and “Volume Down” buttons simultaneously for almost 3 seconds as it connects. This initiates the FRP unlocking process. If everything went smoothly with the unlocking, click “Done.”
Read More About Tecno:
Motorola Master Reset Code: The Ultimate Guide to Restoring Factory Settings
Ultimate Guide on Motorola Spark FRP Bypass
How can I Unlock Motorola Network by Myself?
Conclusion
We can conclude that bypassing the FRP lock can be difficult if one does not follow the proper steps. This guide has provided users with two of the best Motorola Razr 40 FRP bypass methods. Overall, Wondershare Dr.Fone offers the most advanced methods to let users bypass FRP locks easily. Its ability to support a wide range of Android devices makes it more recommended.
Tips: Are you searching for a powerful FRP Bypass tool? No worries as Dr.Fone is here to help you. Download it and start a seamless unlock experience!
5 Quick Methods to Bypass Motorola Razr 40 FRP
Google Factory Reset Protection, a.k.a FRP, is developed by Google for all Android phones. It adds an extra layer of security to your phone and the data on it. It is aimed at making it difficult for the illegal holder of your phone to factory reset your phone and remove tracking information. Then why do we need to discuss the Motorola Razr 40 FRP bypass?
Though the protection is meant for you, sometimes you may forget the password and want your Motorola Razr 40 FRP removed. Also, if you bought a used phone and the previous user has set up FRP with her password, you need to bypass it.
Part 1: In what cases does the Motorola Razr 40 FRP bypass works?
How and why should I bypass Motorola Razr 40 FRP? Let us look at the valid reasons.
1. Buy a locked second-hand Motorola
When you buy a second-hand phone, ideally, the previous user must format and hard reset the Motorola phone to remove all locks and password requirements. However, if it doesn’t happen, you cannot use some options on your phone and configure security because of FRP. Here, your savior is the option of the Motorola Razr 40 FRP bypass.
2. Forget Google account ID and password
Even if you have locked your Motorola phone yourself, you are stuck when you forget your Google username and password. So, you can only recover your phone using the Motorola Razr 40 FRP bypass.
3. The person with a Motorola from his company no longer works for it
Some employees also receive official phones from their company which they have to return when they leave the company. Now, it becomes a horror story for the new employee if he gets the same phone locked with the previous user’s ID.
Part 2: 5 quick methods to bypass Motorola Razr 40 FRP
Ok, now this is established that there are certain situations when you need to conduct a Motorola Razr 40 FRP bypass. So how do you do the Motorola Razr 40 FRP bypass?
Method 1. Retrieve your Google account from another device
If your phone is locked with a Google account whose password you do not know or have forgotten, then you can use this method to Motorola Razr 40 FRP bypass. In this method, you can try to retrieve your Google account from another device. It is a simple step-by-step process tha can be completed from a PC or another mobile device.
If you have forgot the email address but remember the password, then follow these steps.
- Navigate to Google’s Find My Email page in your browser.
When you can’t remember the email address that was configured, go to the Find My Email page and start account recovery process.
- Enter your recovery email or phone number
On the next screen, provide a recovery email or phone number and click Next.

- Provide your first and last name
Enter your first and last name in the given form and click Next.
- Verification code
Google will send a verification code to the setup recovery email or phone number, click Send.
- Verification code entry
Check your email inbox or phone messages depending on the recovery method and find the verification code. Enter it in the given form. If it is correct, you can go to the next final step.
- Choose an account
From the list of accounts showing on the screen, select the account you want to recover.
- Enter your password
Enter the password in the text box and you are done.
If you remember the email but not the password, then the Motorola Razr 40 FRP bypass method will go like this.
- Google’s Account Recovery page
Navigate to the Account Recovery page from the browser on your PC or other mobile devices.
- Enter your email address
Fill in the form with your Google account and click Next.

- Enter the last password you remember
The next form will ask you to enter the last password you remember and that worked
Now, you will receive a message to your registered device, to verify it’s you. Open it and click , Yes, it is me.
Now, wait for six hours for Google to verify it’s you and then they will send a password reset link to your email.
Now, what if you can’t remember your last password, then use the next method.
- Click on “Try another way”
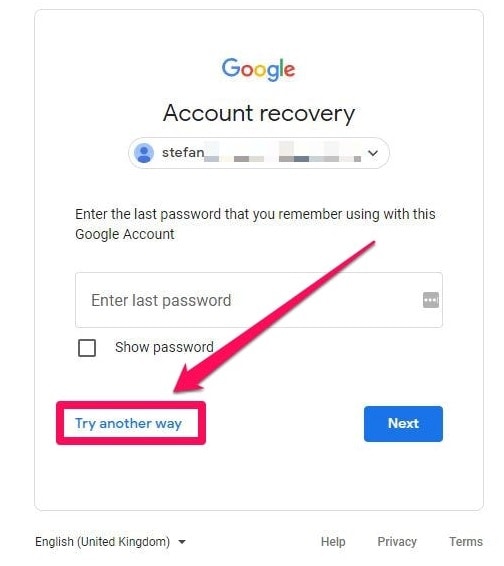
Now Google will send a message to your phone to verify it’s you. On your phone, open the message and click Yes, it’s me.
After verification, Google will send you a password reset link after six hours.
If your phone is not registered in your Google account then, try the next method.
- Click on “Try another way” again

If your phone is enabled to check for the code, click Try another way again.
Google will then ask you to send a verification code to your registered phone number. Click Send.
Find the code from your messages, enter it, and click Next.
Now again, you will wait for six hours till Google sends the password reset link to your email.
Method 2. Use FRP Bypass APK
FRP bypass APK is another tool you can use to Motorola Razr 40 FRP bypass easily. Let us see how it works step by step.
- Download FRP Bypass APK for Motorola Razr 40 FRP bypass android 11.
- Once it’s downloaded, open the File Manager using the Open Files app
- Find the suitable Apk and click on it
- Install & open the APK.
- Open the browser on your phone.
- Launch any of these two below URL.
- Go to the FRP bypass APK >FRP APPS section
- Open Settings leading to the Motorola Razr 40 device Settings>System Settings> Backup & Reset >Reset Phone
- Now click on Reset System Settings Only, and confirm Reset System Settings Only.
- Select Erase All data and confirm.
- Your device will be rebooted.
- Wait till the factory reset process completes.
Now, reboot your device and set it up according to your requirements.
Method 3. Deactivate FRP
Another way to come around Motorola Razr 40 FRP bypass is to deactivate FRP. Let us follow the step-by-step process.
- Launch the “Settings” app and scroll to the Apps.
- Click on the “Manage apps” (applications) and then the “All” tab.
- Open “Google App.”
- Click on the “Clear cache” to remove the Google account cache.

- Also, clear all data to erase data stored.
- Click the “Back” button, and go to “Gmail.”
- Click on the “Clear cache” and “Clear data.”

- In the Motorola Razr 40 device Settings menu and click “Data synchronization.” When your device asks you to enter your Google account, enter your new Gmail account.
You have successfully completed the Motorola Razr 40 FRP bypass process.
Method 4. Bypass with SideSync
You can use SideSync to share the screen and data between your computer and mobile phone. How can we use this for FRP bypass?
- Download the SideSync from the official site and install the SideSync application on your computer.

- Connect your phone and computer to the Google account verification screen.
- Now plug in the first end of your OTG adapter with your phone and connect another end to the flash drive with APK.
- Your phone will launch the file explorer automatically, showing the root directory of the flash drive.
- Now click on the APK file.
- Click Settings and allow to install from Unknown sources, and click OK.
- After installation, open SideSync.
- Disconnect the OTG cable from your Samsung phone.
- Now access the Settings menu and go to the Backup & reset option and conduct a factory reset.
Method 5. 3 Steps to Bypass Motorola FRP Bypass
Dr.Fone - Screen Unlock (Android) is a reliable and efficient tool designed to help users bypass FRP (Factory Reset Protection) locks on Android devices, including Motorola smartphones. This powerful software provides a hassle-free solution for those locked out of their Motorola devices due to FRP lock. With its user-friendly interface and advanced features, Dr.Fone makes FRP bypassing a straightforward process, even for users with limited technical knowledge.
Dr.Fone - Screen Unlock (Android)
Remove Google Lock (FRP) from Motorola Devices
- Pattern, PIN, password, fingerprints & face screen lock can all be unlocked.
- Bypass Android FRP lock without a PIN or Google account.

- Unlock mainstream Android brands like Samsung, Motorola, Xiaomi, etc.
- No tech knowledge required, Simple, click-through, process.
3,981,454 people have downloaded it
3 Steps to Bypass Motorola FRP Lock with Dr.Fone - Screen Unlock (Android)
- Step 1. After installing Dr.Fone - Screen Unlock (Android), launch the program and select the “Screen Unlock” option from the main menu. Continue to Android > Remove Google FRP Lock.

- Step 2. Then select Motorola and click the Start button to continue. Then, connect your locked Motorola device to the computer using a USB cable. Ensure that USB debugging is enabled on your Motorola device before proceeding with the next steps.

- Step 3. Once your Motorola device is successfully connected, Dr.Fone - Screen Unlock (Android) will automatically detect it. Follow the on-screen instructions to put your Motorola device into specic mode. Once in the correct mode, Dr.Fone will start downloading the necessary firmware to bypass the FRP lock.

During the process, it’s crucial to keep your device connected to the computer and refrain from disconnecting it until the bypass is complete. After the firmware download is finished, Dr.Fone will initiate the FRP lock bypass process. Once completed, your Motorola device will restart, and you’ll regain access to it without encountering the FRP lock.

The Bottom Line
FRP is a great feature to add security to Android phones. However, sometimes it is necessary to bypass it to fully use your phone. When you are stuck with an FRP lock, it is a frustrating situation, especially when you want to factory reset your phone. We have described various methods so that you choose the best solution according to your requirements for the Motorola Razr 40 FRP bypass. Among them, bypassing Motorola FRP lock is made simple and efficient with Dr.Fone - Screen Unlock (Android). Say goodbye to FRP lock frustrations and regain access to your Motorola device swiftly with Dr.Fone - Screen Unlock (Android) .

Also read:
- [New] Avoiding Drone Pitfalls Key Factors for a Smart Purchase
- [New] How To Make Profitable YouTube Ads for Free, In 2024
- [New] In 2024, Quick Guide Capturing Time Lapse on Your iPad
- [New] Premium Screen Capturer Non-Lagging Efficiency
- A Quick Guide to Motorola Edge 40 Neo FRP Bypass Instantly
- Discover the Ultimate, Affordable Tool to Transform Your Valorant Gameplay for 2024
- Getting Bluetooth to Show Up Again? Here's How to Adjust Your Device Manager Options
- How to Hard Reset Tecno Pova 6 Pro 5G Without Password | Dr.fone
- In 2024, A Step-by-Step Guide on Using ADB and Fastboot to Remove FRP Lock on your Oppo F23 5G
- In 2024, How to Bypass FRP on Lava Storm 5G?
- In 2024, Is GSM Flasher ADB Legit? Full Review To Bypass Your OnePlus 11 5GFRP Lock
- In 2024, Is GSM Flasher ADB Legit? Full Review To Bypass Your OnePlus 12RFRP Lock
- In 2024, Ultimate Guide on Lava Blaze Pro 5G FRP Bypass
- Is GSM Flasher ADB Legit? Full Review To Bypass Your Oppo Reno 11 Pro 5GFRP Lock
- Lava Blaze 2 ADB Format Tool for PC vs. Other Unlocking Tools Which One is the Best?
- Securing Your Digital Life: Weekly Windows Backups
- Troubleshooting Tips: Preventing Your 'Resident Evil Ebuild 4 Remastered' From Crashing
- Title: In 2024, A Step-by-Step Guide on Using ADB and Fastboot to Remove FRP Lock on your Motorola Razr 40
- Author: Liam
- Created at : 2025-01-23 16:02:07
- Updated at : 2025-01-24 16:02:00
- Link: https://android-frp.techidaily.com/in-2024-a-step-by-step-guide-on-using-adb-and-fastboot-to-remove-frp-lock-on-your-motorola-razr-40-by-drfone-android/
- License: This work is licensed under CC BY-NC-SA 4.0.
