
Hassle-Free Ways to Remove FRP Lock on Nokia C12with/without a PC

Hassle-Free Ways to Remove FRP Lock on Nokia C12 Phones with/without a PC
“I just bought a used Nokia device from the mobile market without checking the already signed in Google account, and I don’t even know what Gmail ID is added to this device, so I’m looking for FRP Nokia bypass tools. Please help.” A user says so on Quora.
In all such and similar situations when you have authorized access to your Nokia or any other Android device, but not the right Google credentials, the need for a tool that can bypass the lock arises. The content below will take you through these FRP bypass Nokia tools.
Part 1. Can I Bypass Google Lock on Nokia ?
Yes, the Google Lock on Nokia can be bypassed using an FRP bypass tool. Although in case of theft and loss, the FRP lock is a great feature, but on the flip side, in a situation where you forget your Google credentials, the function can be more of a problem than of use. Additionally, if you have got a hand on a second-hand device having an FRP lock, then also you would be in trouble accessing the phone.
You can choose between tools without a computer as well as PC-based programs to bypass and remove the Google Account. Once the account is removed using the tools, the following will be the benefits.
- You will have complete access to your Nokia device and its features.
- Once the lock is removed, it will completely de-link from the previous Google account and hence cannot be blocked or traced by the previous owner.
- You can permanently delete the Google account.
Part 2. How to Bypass Google Lock on Nokia Without Computer? (30 Min & Free)
To remove the Nokia FRP bypass without using a system, the EMERGENCY CALL method can be used. Though this method is free, it is lengthy and complicated.
Steps for Nokia FRP bypass without computer
- Step 1. Connect your Nokia phone to a Wi-Fi and then switch it on for the HELLO screen to appear. Next, select the Emergency Call option and then click on Emergency Information two times.
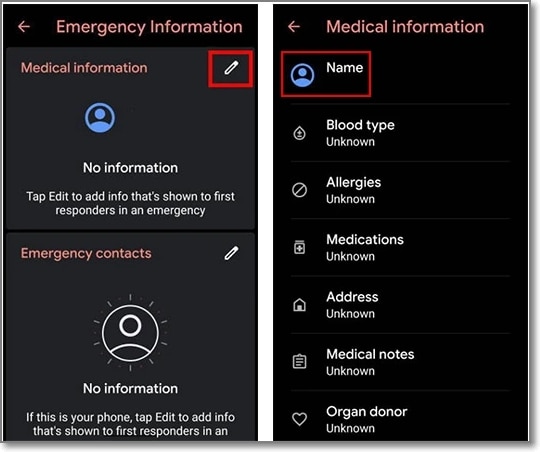
- Step 2. On the Emergency Information page, tap on the Pencil icon and Name. Next, click o the profile icon and select the option of changing an image.
- Step 3. Next click on Menu > Photos > Permissions. Click on the Contacts options and select See All apps with this permission.
- Step 4. Click on the Search > Settings> Settings App Info > Open. With this, you will enter the Settings section of the Nokia C12 device, after which select Accessibility > Accessibility Menu and turn in On.
- Step 5. Go back to the settings and choose Apps & Notifications > App Info. The list of the app will appear, and now you will have to disable some apps for the FRP process.
- Step 6. Choose 3 dots > Show System Apps and then click on Android Setup > Force Stop > OK.
- Step 7. Using the Storage & Cache option, wipe off the Storage and the Cache. Click Disable > Disable App.
- Step 8. Next, click on the blue settings icon of Android Setup and click on Force Stop.
- Step 9. From the Android Setup, remove all the storage and the cache data. Next click on Google Play Services > Disable > Disable App.
- Step 10. Now you need to go to the main Hello homepage by clicking on the back arrow multiple times. Select the Start option and the Nokia C12 device screen will start loading.
- Step 11. When the updates are being checked by the screen, go back to the Wi-Fi connection page.
- Step 12. Open the Shortcut Menu by swiping up from the bottom to the top using 2 fingers.
- Step 13. Click Assistant > Settings > Enable Google Play Services. Move back and select Skip > Continue.
- Step 14. Click on More > Accept.
- Step 15. At the Set Screen Lock, click Skip > Skip > OK > Accept & Continue and then go to the home screen.
- Step 16. Finally, to bypass google lock on Nokia without pc, go to Settings > System > Advanced > Reset Option and here choose to Erase All Data options 3 times.
Part 3. How to Bypass Google Lock on Nokia with Computer? (15 Min but Paid)
If you have access to a computer, Motoreaper is a decent Nokia FRP tool for Nokia FRP bypass with computer. Developed by the Phonlab team, Motoreaper is a Windows-based tool that works on the majority of Nokia devices including Moto E, Moto X, Moto G, Droid Turbo, Droid Maxx2, and others.
Steps for Nokia FRP bypass using Motoreaper
- Step 1. Download and install the Motoreaper software on your system and launch the same.
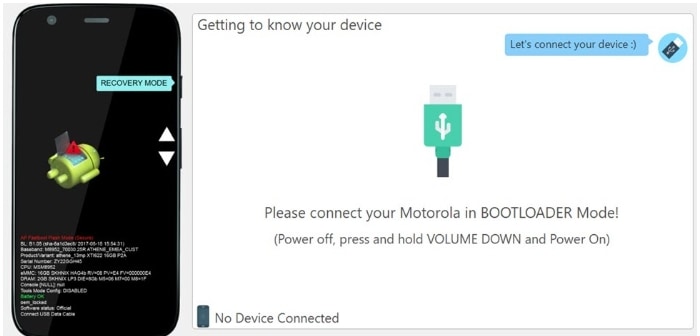
- Step 2. Now you need to get your Nokia phone into bootloader mode and for this, you need to power off your device and then turn it on by pressing and holding the power and volume down buttons together for a few seconds.
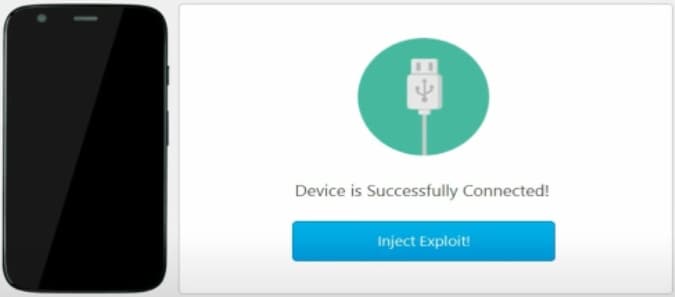
- Step 3. Next, connect your phone to your PC using a USB cable and the software will successfully show the connected device.
- Step 4. Next, unplug your Nokia phone and boot it into the factory model using the bootloader mode by pressing the power and volume down button. When the factory mode appears, use the power button to select it.
- Step 5. Now connect your phone again to your system and let it boot up completely. Next, click on the I have Done option.
- Step 6. Now your device is on the factory mode where you need to click on, the I Confirm option.
- Step 7. Next for Nokia Google bypass, use debugging in your device and then tap on I confirm at Moto Rapersoftware.
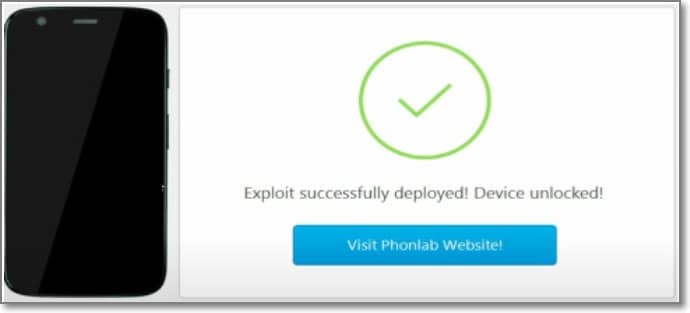
- Step 8. The Unlock No button will appear in the Moto Reaper software which you have to click after which the Google bypass Nokia process will be complete and the FRP lock will be removed.
Part 4. How to Unlock Nokia Phone Passcode? (5 Min)
Besides FRP lock, the screen lock of your Android phones including Nokia is one of the most common situations. So, if to have forgotten your screen lock code or have a device with a locked screen, the best tool we reconned is Dr.Fone - Screen Unlock (Android) . This simple system-based software will let you remove all types of screen locks – PIN, password, pattern, as well as a fingerprint in a few simple and quick steps. The software is reliable and safe without causing any harm to your device.

Dr.Fone - Screen Unlock (Android)
Get into Locked Nokia within Minutes
- 5 screen lock types are available: pattern, PIN, password, fingerprints & Face ID.
- Easily remove the lock screen; No need to root your device.
- Everybody can handle it without any technical background.
- Provide specific removal solutions to promise good success rate
4,008,671 people have downloaded it
Step 1. Launch the installed software on your system and from the main page, choose the Screen Unlock option.
Step 2. Using a USB cable, connect your phone to your system and then select Unlock Android Screen option on the software interface.

- Step 3. From the supported list on the software interface, select Nokia .

- Step 4. Your Nokia phone will enter into a dedicated mode. Once in this mode, Dr.Fone will initiate the Nokia screen unlock process.
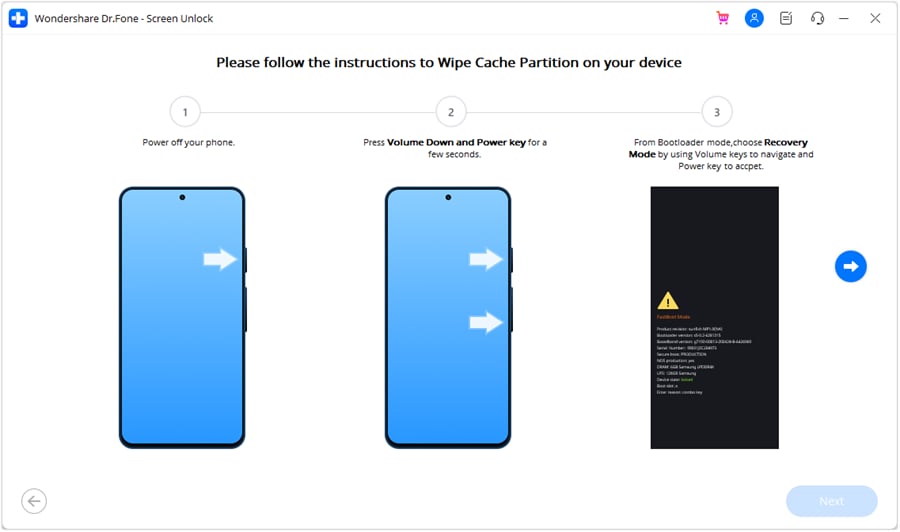
- Step 5. When the process is complete, you can access your Nokia device without any need for a password.


Conclusion
Nokia FRP lock can be removed using the Emergency Call option or the above-mentioned Motoreaper tool. For removing any type of screen lock without password on your Android devices, Dr.Fone – Screen Unlock (Android) works as the best option.
How Can We Bypass Nokia C12 FRP?
After you hard reset your Nokia smartphone, you must open the FRP lock before using it. If you can’t pass the FRP lock, Google will block your device for privacy and security. You can easily pass the Nokia FRP lock with your Google account and password. You will get stuck there if you don’t know your account and password. Although it seems like a big problem, there is no need to panic because you can bypass it using other methods.
One of the fastest ways to remove the FRP lock is to use the Nokia FRP code. If you don’t want to use this method, you can also use the talkback method to bypass FRP. Both of these methods work perfectly every time, so the choice is up to you. Here, we will give you an easy guide to bypass FRP on your Nokia .
Part 1: What is Nokia FRP Bypass Code?
Factory reset protection is a Google security feature that protects your phone from unauthorized access. The FRP activates when you log in with a Google account on your smartphone. When you reset your device, the FRP asks for Google verification. The FRP lock doesn’t allow device access without your Google account and password. You can enter the Nokia FRP bypass code to open the FRP lock on your device without your Google account and password.
Even for smartphones from the same brand, the method to bypass FRP varies for each model. Instead of using complex methods to bypass FRP on your device, you can use the bypass code to remove the lock in seconds. The English Nokia FRP code is *#813#, and the Chinese code is *#812#. You can learn how to use these codes from our step-by-step guide.
Part 2: Efficient Ways to Bypass Nokia FRP
In this part, we will explore three efficient methods to bypass Nokia FRP and weigh the advantages and disadvantages of each.
A Comprehensive Comparison of Three Methods to Bypass Nokia FRP
| Method | Advantages | Disadvantages |
|---|---|---|
| Wondershare Dr.Fone [Fast & Easy] | 1. Efficiency: Wondershare Dr.Fone offers a fast and efficient FRP bypass process, ensuring quick access to your Nokia device. | |
| 2. User-Friendly: The software comes with an intuitive interface, making it accessible to both novice and experienced users. | ||
| 3. Comprehensive Solution: Beyond FRP bypass, Wondershare Dr.Fone provides additional features for data recovery and device optimization. | Cost: While the software may require a purchase, the cost is justified by its effectiveness and additional functionalities. | |
| Nokia Emergency FRP Code | 1. Official Solution: This method is officially supported by Nokia , ensuring compatibility and reliability. | |
| 2. No Additional Software: The Emergency FRP Code doesn’t require third-party software installations, simplifying the process. | 1. Limited Accessibility: Obtaining the Emergency FRP Code may involve contacting Nokia support, leading to potential delays. | |
| 2. Complexity: The process might be more complex for users unfamiliar with official support channels. | ||
| Talkback Method to Bypass | No External Software: This method doesn’t require additional software installations, making it a straightforward option. | 1. Technical Skill Required: The Talkback Method involves navigating through device settings, which might be challenging for users without technical expertise. |
| 2. Time-Consuming: Compared to software solutions, this method may take longer to complete. |
1: Recommended: Use a powerful software-Wondershare Dr.Fone [Fast & Easy]
Facing the FRP (Factory Reset Protection) lock on your Nokia phone can be a roadblock, but with the right tools, the process becomes seamless. In this step-by-step guide, we’ll walk you through the easy and effective steps to bypass the FRP lock on your Nokia phone using the reliable Dr.Fone - Screen Unlock (Android) .

Dr.Fone - Screen Unlock (Android)
The Best FRP Lock Removal Tool for Nokia
- Pattern, PIN, password, fingerprints & face screen lock can all be unlocked.
- Bypass Android FRP lock without a PIN or Google account.

- Unlock mainstream Android brands like Samsung, Nokia , Xiaomi, etc.
- No tech knowledge required, Simple, click-through, process.
4,008,671 people have downloaded it
Step-by-Step Guide to bypassing Nokia Frp Lock
Follow these straightforward steps to bypass the FRP lock on your Nokia phone using Dr.Fone:
- Step 1. Launch Wondershare Dr.Fone and select Toolbox > Screen Unlock.
- Step 2. Choose Android and then click Remove Google FRP Lock button on the next page.

- Step 3. Then you will see various device brands and select OPPO among the options.
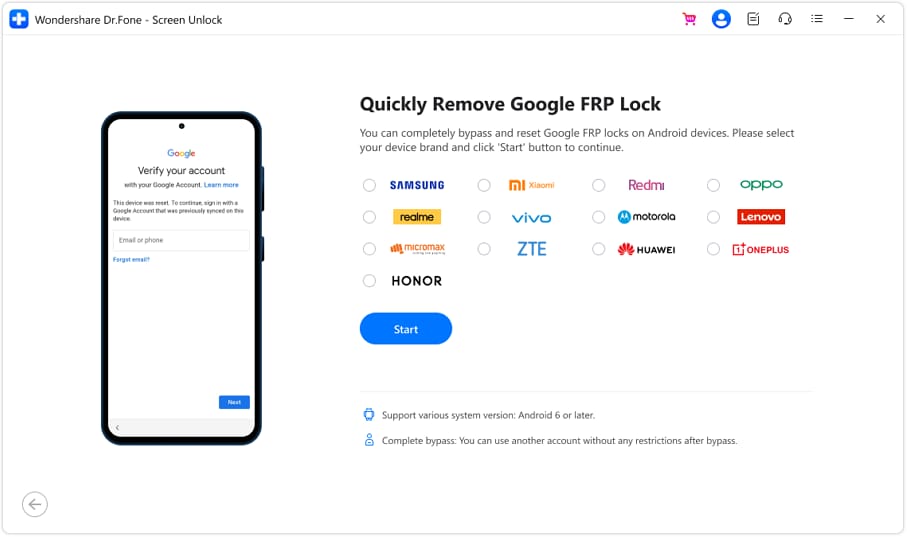
- Step 4. Once you have selected the Nokia C12 device brand, Dr.Fone will initiate the downloading process of FRP.
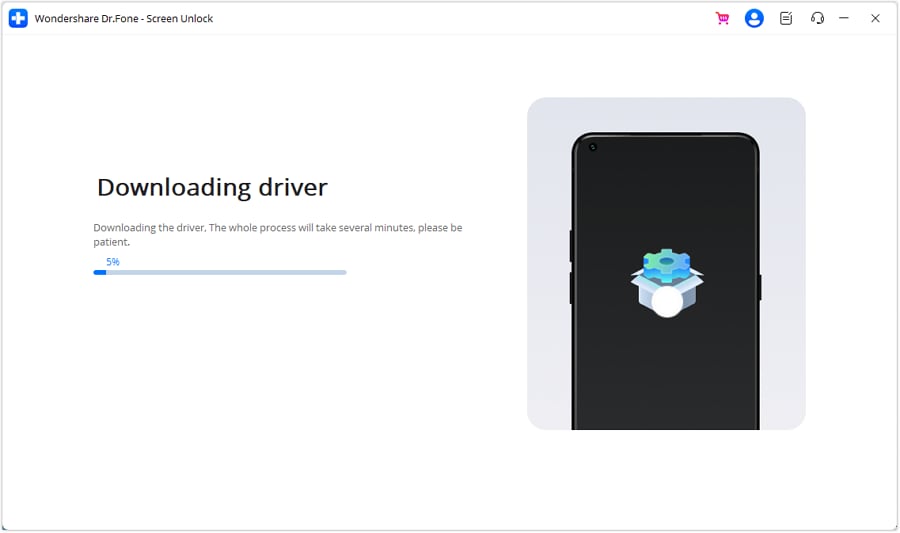
- Step 5. When it finished downloading, please turn off your device and connect it to the computer. Press the Volume Up and Down buttons for about 3 seconds during the connecting process.
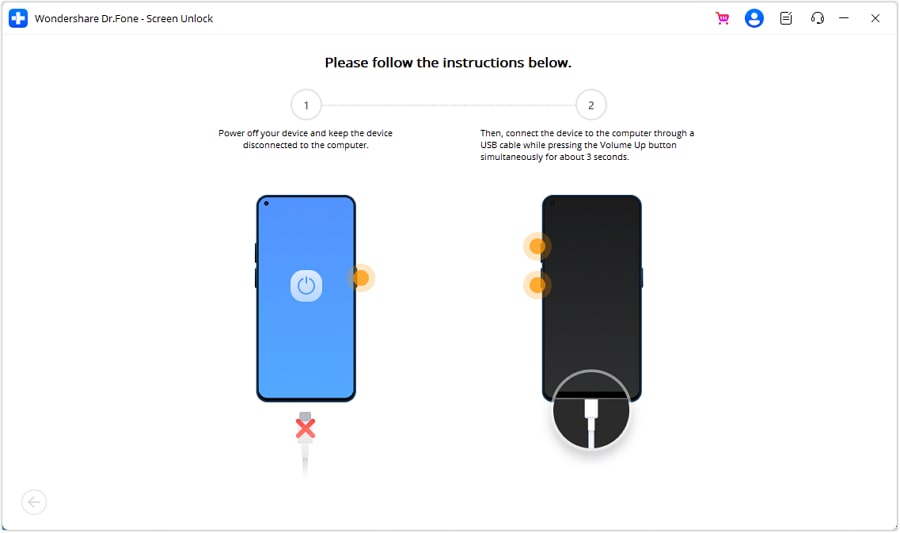
- Step 6. Wait for a few minutes until the FRP is unlocked.
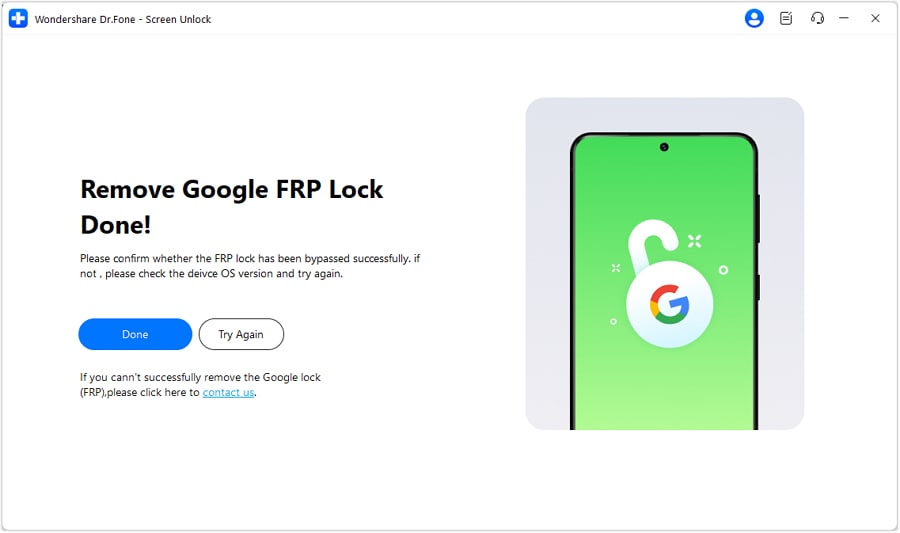
Wondershare Dr.Fone is a reliable software to bypass Nokia FRP with a high success rate. Its easy-to-use feature makes it popular among users. We recommend it as your first choice.

2: Use Nokia Emergency FRP Code
The Nokia Emergency FRP Code is an alternative method to bypass FRP, relying on a unique code provided by the Nokia C12 device manufacturer. After you do a factory reset on your Nokia smartphone, don’t rush to set it up. If you set up your device, the FRP lock will appear on the screen. When you go to the language selection screen, tap on the emergency call option to open the dialer. That’s where you will be entering the Nokia FRP bypass code. Follow these steps to remove the FRP lock from your smartphone.

- Step 1. Power on your Nokia device after the factory reset.
- Step 2. Start the Nokia C12 device set up and connect it to a Wi-Fi network.
- Step 3. After you enable the Wi-Fi connection, return to the welcome screen.
- Step 4. Tap on the “Emergency Call” option at the bottom left of the language selection page.
- Step 5. Type one of the FRP bypass codes (*#813# or *#812#) on the dialer and tap on the “Dial” button.
- Step 6. Next, don’t do anything and wait for the home screen of your Nokia device to appear. You might see some alerts, but you don’t have to touch the screen.
- Step 7. Once you enter your phone, open “Settings” and go to “About phone”.
- Step 8. Enable Developer options by tapping on the android version between seven to ten times.
- Step 9. From the Developer Options, enable USB debugging.
- Step 10. Now, go back to “Settings” and reset your Nokia device from the “Factory Data Reset” option.
- Step 11. Once the reset is complete, you can set up your device and enter it without FRP.
3: By Talkback Method to Bypass
For those seeking a manual approach, the Talkback Method involves leveraging the accessibility feature on the Nokia C12 device. Before using the Talkback method, ensure that your phone has more than 50% battery backup and an internet connection. The Talkback method will not work on devices with the latest Android operating system. Here are the steps to bypass Nokia FRP lock with the Talkback method.

- Step 1. Power on your Nokia smartphone and hold the volume up + down buttons at the same time to enable the Talkback feature.
- Step 2. Select “Turn on” to open the Talkback shortcut. Once you enable this feature, you can long press the volume up + down buttons to enable it anytime.
- Step 3. Now, double tap on the close button on the screen twice.
- Step 4. Next, draw the letter “L” on the hello screen and double-tap on the “Talkback Settings”.
- Step 5. In the menu, swipe down with two fingers to navigate to the “Braille Keyboard”. Double-tap to select it and go to “keyboard settings”.
- Step 6. Now, open the “Talkback Braille Keyboard” and return to the add network screen. Also, turn off the Talkback feature by long pressing the volume down + up buttons together.
- Step 7. Click on the keyboard icon to open the “Talkback Braille Keyboard” again. Enable accessibility settings and swipe right to enter the “General” option.
- Step 8. Navigate to “Help & Feedback” from the accessibility menu.
- Step 9. Tap on the “Control Your Nokia C12 Device with Switch Access” and tap on the “Play” icon. Next, tap on the three dots in the video corner.
- Step 10. elect the “Share” option and tap on the three dots next to the Twitter icon this time.
- Step 11. Go to “Settings” from the “Profile” icon and select “YouTube Terms and Services” from “History & Privacy”.
- Step 12. Next, tap on the “Accept and Continue” option. Select “Next” and tap on “No Thanks” on the next page.
Which Method is Best to Bypass Nokia FRP Lock?
Choosing the right method to bypass Nokia FRP depends on your preferences, technical proficiency, and urgency. Wondershare Dr.Fone - Screen Unlock (Android) offers a swift and user-friendly solution, the Nokia Emergency FRP Code provides an official route, while the Talkback Method caters to those who prefer a manual approach. Consider the advantages and disadvantages outlined above to make an informed decision and regain access to your Nokia device efficiently.

Part 3: FAQ for Bypassing Nokia FRP (Factory Reset Protection)
Below you’ll find answers to some of the most common questions regarding bypassing Factory Reset Protection (FRP) on Nokia devices.
1. What is the FRP skip code for Nokia ?
Currently, there is no universally applicable “FRP skip code” for Nokia devices. FRP is a security feature, designed to prevent unauthorized access to your device after a factory reset. If you are the legitimate owner and need to bypass FRP, you may need to contact Nokia customer support or follow authorized methods for FRP bypass, which usually involve verifying your Google account credentials.
2. What is the emergency code for FRP bypass?
There is no official emergency code for bypassing FRP on Nokia or other Android devices. FRP is a critical security feature implemented by device manufacturers to protect users’ data. To bypass FRP, you must follow the legitimate procedure provided by Nokia or seek professional assistance.
3. How to remove screen lock in Nokia mobile?
Unlocking your Nokia mobile’s screen with Dr.Fone - Screen Unlock (Android) is a seamless solution. Unlike hard resetting, which often leads to FRP lock issues, Dr.Fone provides a faster and safer alternative. This Nokia Unlock Tool swiftly bypasses the lock screen without requiring a password, ensuring a secure and efficient process.

4. How to remove an admin in Nokia ?
To remove an admin, or a device administrator:
- Step 1. Go to ‘Settings’ on your Nokia device.
- Step 2. Scroll down and tap on ‘Security’.
- Step 3. Then, select ‘Device Administrators’ or ‘Device Admin Apps’.
- Step 4. You will see a list of apps with administrator privileges. Find the admin you want to remove and toggle off its access.
- Step 5. Confirm by tapping ‘Deactivate’ when prompted.
5. How to disable Nokia security?
Disabling security features like passwords, PINs, pattern locks, or biometric scans can be done through settings:
- Step 1. Open ‘Settings’ and go to ‘Security’.
- Step 2. Tap on ‘Passcode’, ‘Biometrics & Passcode’, or a similar option depending on your device model.
- Step 3. Choose the lock method currently in use and select ‘None’ or ‘Disable’.
Note: Disabling security features makes your device more vulnerable to unauthorized access.
Conclusion
Let’s conclude our guide on how to bypass the Nokia FRP lock. You can remove the FRP lock from your Nokia device with various methods. The fastest and easiest way is to use the Nokia FRP code, which lets you bypass the FRP lock within seconds. You can also use the Talkback method if you have an older Nokia device. In addition to the FRP lock, you can bypass the screen lock on any Nokia device with Dr.Fone - Screen Unlock (Android) . Dr.Fone enables users to unlock any android device without a password. It is a one-stop solution with features like WhatsApp transfer, data backup and restore, data eraser, and system repair.
AddROM Bypass: An Android Tool to Unlock FRP Lock Screen For your Nokia C12
Are you an Android user? Have you reset your device and are now stuck at the Google FRP lock screen? If yes, you are not the only one who got into this scenario.
Many Android users need to reset their devices for any reason. But they don’t know that their devices are now protected with the new security feature called FRP. This lock requires Google credentials Image nameed to your locked device to access it.
However, in most cases, users don’t remember their Google ID and password. This is where AddROM Bypass steps in to help. This article will explore how you can use AddROM to unlock the FRP lock.
But before starting, let’s learn about AddROM!
Part 1. What is AddROM?
AddROM is a special tool designed to bypass the Factory Reset Protection (FRP) lock. This tool comes in various versions. Each version supports its relevant Android device.
However, the good thing about this tool is that you don’t need any PC or laptop to act. All you are supposed to do is download and install the AddROM APK file on your Android phone. After that, you can bypass the FRP lock in just a few minutes.

But if you have an Android phone with a version above 9.0, you can try an alternate method explained in this article. Let’s move further to the steps of using AddROM.
Part 2. How to Download and Use AddROM APK?
You must be wondering how to download the AddROM bypass on an already-locked device. Well, you cannot download it on a locked device. Therefore, you need an extra Android device for the help purpose. After you arrange the Nokia C12 device, you can download AddROM bypass from its official website.
Once you have downloaded and installed the AddROM APK file, you can follow the steps given below:
Step 1: First, you must ensure you have an active SIM card in your locked device. Once confirmed, put it aside and graph another phone in which you installed the AddROM.
Step 2: Open your browser and visit the official website of AddROM. Scroll down and download the “ HushSMS.apk“ file. Then go to “My Files“ > “Downloads “ and find HushSMS.apk to install it.

Step 3: After the app is installed, open it and click “WAP PUSH SL.“ Then enter the phone number of the locked device. Now, In the Message box, type “www.youtube.com/@addROMcom “ and click the “SEND WAP PUSH SL “ button.

Step 4: Wait for a while until the AddROM YouTube channel will automatically open on your locked phone. Click the “Menu“ icon at the top right corner and select “Terms & Privacy Policies.”
Step 5: After clicking Terms & Privacy Policies, a browser page will be opened. Click the search bar to type. Here, type “addrom.com/bypass,“ scroll down, and then download the relevant “Google Account Manager “ (GAM) APK.

Step 6: Also, you are supposed to download the “ FRP bypass APK“ file from the list. Once the downloading is finished, install both apps on your device.
Step 7: Open the FRP bypass APK app and click the “Menu“ icon at the top right corner. Click the “Brower sign-in“ option and sign in with the Google account you want. Then, restart your Android device.
After a restart, you won’t get to see the FRP lock again. It will be successfully removed. However, most users find this method very complex, and the success rate is also not guaranteed.
Part 3. Does AddROM Really Work?
The success rate of the AddROM bypass can only be endorsed from the reviews of previous users. They can tell us if the users successfully bypass the FRP locks with this tool. From anecdotal research, we have discovered that some users could bypass the lock.
However, there were a lot of users who reported that they regained access to their phones. On the contrary, we also discovered that some users complained about the inefficiency of this tool. It was also incompatible with various Android versions.
Part 4. Pros & Cons of AddROM
While these kinds of tools offer us a lot of benefits, they also have some drawbacks. In this section, we will explore some of the potential pros & cons of AddROM FRP bypass.
|
Pros
|
Cons
|
| — | — |
| It is available for free and can bypass the FRP lock on Android phones. | AddROM is not compatible with Android version 10 and above. |
| You don’t need a PC or laptop to use this tool. | There is no official support team, so you won’t get any assistance. |
| | Using AddROM may void the warranty of the Nokia C12 device you are using. |
| | Novice users may find the bypass process with AddROM complex. |
Sometimes, using APK files to remove the FRP lock may not work. Moreover, downloading them from untrusted platforms can cause security risks for your device.
Therefore, we recommend you go for a more effective and safer option. In the next section, we will discover the best alternative to AddROM APK to bypass the FRP lock.
Part 5. Editors’ Pick-Best Alternative to AddROM
Using unethical means to bypass the FRP lock can be troublesome. You may end up compromising the security or warranty of your device.
So, you need the best solution to remove the FRP lock, and Wondershare Dr.Fone - Screen Unlock (Android) is here to help you. It is the most effective and reliable way to remove the FRP lock. With this tool, you can regain access to your Android phone in just a few clicks. Not only FRP, but you can also remove PIN, pattern, password, and fingerprint lock.
Whether you forgot your password, lost your Google account, or bought a secondhand phone with FRP lock, Dr.Fone has got you covered.
The best thing is that you need to be a tech expert to use this tool. Its user-friendly interface makes it accessible to everyone. If you are impressed by these features, you must be wondering how to bypass the FRP lock using Dr.Fone. If yes, then let’s move forward and explore the steps to use this tool.

Dr.Fone - Screen Unlock (Android)
The Best AddROM Alternative to Bypass FRP and Solve Your Screen Locks
- Remove all Android screen locks (PIN/pattern/fingerprints/face ID) in minutes.
- Bypass the FRP lock of Samsung without a PIN or Google account.
- Everyone can handle the lock screen without any tech knowledge.
- Provide specific removal solutions to promise good success rate.
4,008,671 people have downloaded it
First, download and install the Dr.Fone app on your Laptop or PC. Then, follow the instructions given below:
Step 1: Launch Dr.Fone, and connect your Android device (We are taking Samsung as an example) via a USB cable or wireless connection. Once the Nokia C12 device is connected, click “Toolbox” > “Screen Unlock“ to open options on the new window.

Step 2: You will see two options on your screen. Select “Android“ and continue. Then, select “Remove Google FRP Lock“ and proceed.

Step 3: Now you will see options for multiple Android phone brands. We are removing the FRP lock of the Samsung phone. So, we will select Samsung and click the “Start“ button.

Step 4: Now, select the Android OS version of your phone and click the “Start “ button. However, if you are not sure about the Android version, you can select the “All Android Version (One-Click Removal) “ option.
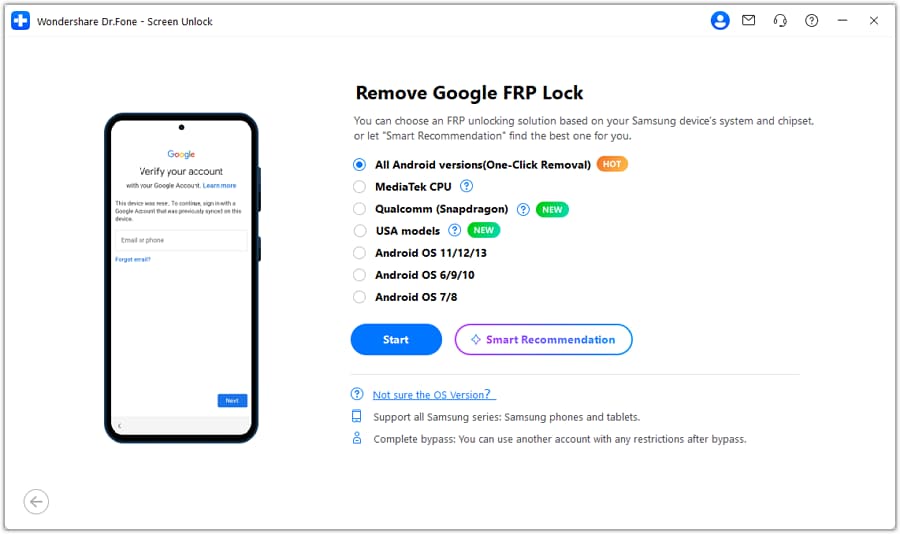
Step 5: Here, you have to follow the on-screen instructions. Find the “ Emergency Call “ button on your Android and click it. Type #0# to open a secret menu. Then, click the “Next “ button on your computer screen.
Step 6: You will see a pop-up on your phone’s screen to activate USB debugging. After allowing it on your device, click “ Authorized“ on your Dr.Fone screen.
Step 7: Dr.Fone will start removing the FRP lock from your Samsung device. Once the process is completed, you will see the interface shown below. You can check your device. If it’s successful, you can click “Done.“ Otherwise, you can try again.
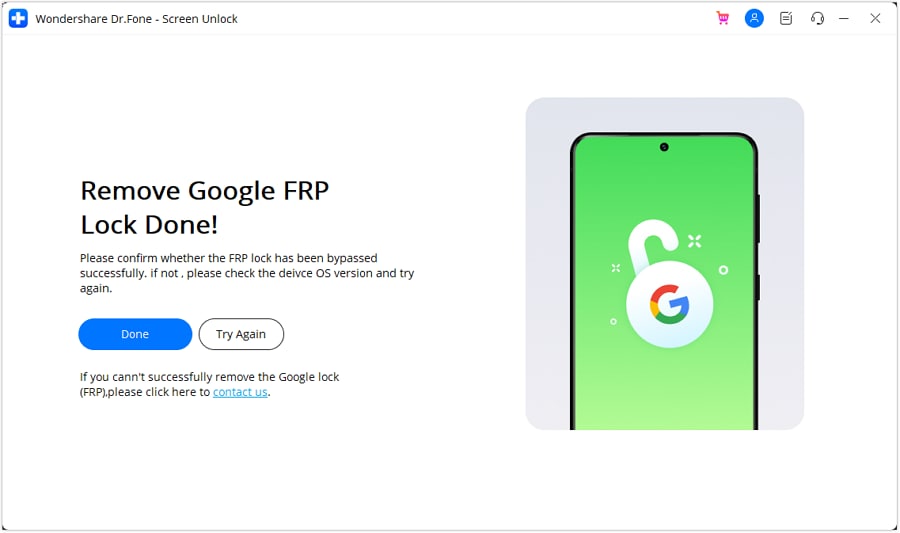
Did you see how easy it is to bypass the FRP lock with the help of Dr.Fone? There is no need to manually perform complex steps. Just a few clicks and you are done. However, if you still want to continue with the AddROM Samsung, you must consider some factors.
Part 6. Factors to Consider Before Using AddROM
Here are some factors that you should consider before using AddRombypass:
- Using AddROM APK may void your device’s warranty. It can impact future support from the manufacturer.
- Bypassing the FRP lock screen with this tool could risk your data and privacy. It can expose your data to vulnerabilities.
- Be aware of legal restrictions surrounding the use of AddROM. Make sure it is allowed in your jurisdiction to avoid legal consequences.
- Successfully using AddROM requires technical knowledge. Improper use may lead to device malfunction or data loss.
- Research feedback from other users who have used this tool to bypass FRP locks. It can help you to understand potential risks and benefits.
- Before using AddROM, ensure you have backed up important data on your device. It will help you to prevent loss during the unlocking process.
Conclusion
We all know that FRP locks can be annoying and cause you trouble. But thankfully, there are different ways available to bypass it. We hope you successfully removed the FRP lock and regained access to your Android phone.
Using AddROM FRP bypass is indeed a complex and time-consuming method. Some users couldn’t even follow all the steps and left the process in the middle. Whereas, Wondershare Dr.Fone - Screen Unlock (Android) is an easy and reliable alternative.
The best thing about this tool is it is not just limited to FRP bypass. There are many other features, such as data recovery, data manager, system cleaner, etc, offered by Dr.Fone .
Also read:
- Essential Troubleshooting Steps for Correcting Missing DLL Messages
- Extension Headers in IPv6 Must Be Carefully Managed and Inspected as They Could Potentially Be Exploited for Malicious Purposes
- Heaviest Drone Assemblies Essential Top-Ten Lists for 2024
- How to Bypass Google FRP Lock from Samsung Galaxy M54 5G Devices
- In 2024, AddROM Bypass An Android Tool to Unlock FRP Lock Screen For your Samsung Galaxy F54 5G
- In 2024, Building a Successful Brand Presence Through Spotify Advertising
- In 2024, FRP Hijacker by Hagard Download and Bypass your Motorola Moto G23 FRP Locks
- In 2024, Full Screen Mastery for Premier Pro Users
- In 2024, How to Bypass FRP on Motorola Moto G34 5G?
- In 2024, Pushing Boundaries Exploring iPhone X's Unique Lens Tech
- In 2024, Ultimate Guide from HTC U23 Pro FRP Bypass
- Instant Access: Your Guide to Direct3D Downloads
- Latest Guide How To Bypass Meizu 21 FRP Without Computer
- Latest Guide How To Bypass Samsung FRP Without Computer
- Top 5 Motorola Defy 2 Bypass FRP Tools for PC That Actually Work
- Updated In 2024, The Art of Visual Storytelling Ken Burns Effect in Final Cut Pro Explained
- What You Need To Know To Improve Your Realme 12 5G Hard Reset | Dr.fone
- Title: Hassle-Free Ways to Remove FRP Lock on Nokia C12with/without a PC
- Author: Liam
- Created at : 2025-01-11 16:53:45
- Updated at : 2025-01-12 16:55:47
- Link: https://android-frp.techidaily.com/hassle-free-ways-to-remove-frp-lock-on-nokia-c12withwithout-a-pc-by-drfone-android/
- License: This work is licensed under CC BY-NC-SA 4.0.
